Thursday, February 16, 2012

I am so fortunate to have you!

Happy Day after Valentine's! I know most people are ready to move on to the next holiday and swap out their red for green, but I have one more idea to share. Put it in the idea pot for next year because it is CUTE. Don't take my word for it though, just look:


Isn't it adorable? I got the idea at Eighteen25, only they did it for teachers for the first day of school. I book marked it months ago and had been eagerly waiting for the time to come when I could make it my own.


This can be an incredibly simple gift, make a cute tag, throw the cookies in the box, bam you're done. I like to make things hard though. I made the cookies from scratch. I even tried two different recipies! I also made my own 'fortunes.' Only instead of fortune's I did reasons I was fortunate to have them in my life. I also dipped the finished cookies in chocolate and decorated them with sprinkles. Fun, but time consuming!

As I said, I used two different recipies. If you are going to do this yourself (it's not terribly hard, but does require a little practice), you need to decide what is important to you. The one recipie tasted like a regular fortune cookie, and looked nice when it was done. The second recipie was much better tasting than a regular fortune cookie, but didn't fold as nicely (the cookie would tear/crack). So you need to make a chocie there. Since I was giving them as gifts and was giving lots of them I didn't have time to fool around with the cookies so I used the first recipie. Still tasty, and since they never had the second recipie, they don't know what they're missing anyway!

The tastier recipie I found at Haniela's. I didn't have the cake and cookie emulsion, so I used 1/2 t vanilla and 1/2 t. almond instead

The easier to fold recipie I found at About.com

I found a great video on how to fold them here

I would HIGHLY recommend wearing thin cotton gloves (I bought mine at CVS). You fold the cookies while they are hot, and doing it with out the gloves was no fun, I had to go buy some gloves.

And for funsies, here is an adorable idea I saw someone had for halloween

I hope you had a lovely holiday, and that you put this idea away for a time when you need to tell someone how fortunate you are to have them in your life.

Tuesday, February 14, 2012

Happy Valentine's Day


Whether you are with someone or not, I hope you have a wonderful Valentine's Day. Take time to tell someone you love them, and maybe do something little for them. I think everyone just wants to be and feel loved. I think Valentine's day is a great reminder of that!

Tuesday, February 7, 2012

Pumpkin Scones

I was hoping to share some tasty chocolate chip cookie dough brownies that I made for the super bowl with you today, but they ended up being a failure. :( I hate when that happens, I get really excited about something and then it's a flop, it's even worse when you were planning to give them to people, let's say at a super bowl party. Luckily I have an amazing friend named Mandy, who likes baking as much as I did. She made these awesome red velvet cupcakes with blue icing, and decorated them with football candies and wrote out Pats, Giants, and XLVI in white chocolate and put those on as well. Not only were they incredibly cute, they were delicious. I wish I had taken a picture instead of just eating them up!

Anyway, so instead of yummy brownies I have something entirely different, Pumpkin Scones. I found this recipie over at Recipie Girl several months ago. I just made them for the second time when my cousin was visiting for her birthday. I made the scones and Blueberry Buckle thinking the Buckle would go first, but everyone ate up the scones and I can't blame them, they're delicious!


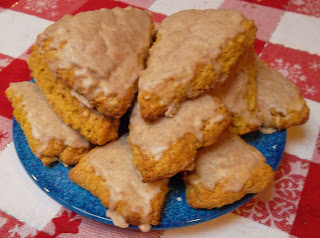
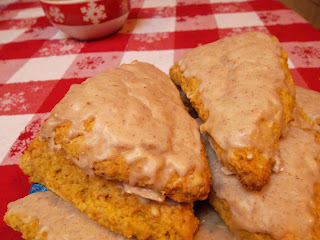
<3 Pumpkin Scones <3

SCONES:
2 cups all-purpose flour
3/4 cup granulated white sugar
1 tablespoon baking powder
1/2 teaspoon salt
1/2 teaspoon ground cinnamon
1/2 teaspoon ground nutmeg
1/4 teaspoon ground cloves
1/4 teaspoon ground ginger
1/2 cup canned pure (unsweetened) pumpkin
3 tablespoons half and half cream
1 large egg
6 tablespoons cold butter, cut into cubes

PLAIN GLAZE:
1/2 cup powdered sugar (sifted)
1 tablespoon milk (any kind)

SPICED ICING:
3/4 cup powdered sugar (sifted)
1 to 2 tablespoons milk (any kind)
1/4 teaspoon ground cinnamon
1/8 teaspoon ground nutmeg
pinch of ground ginger
pinch of ground cloves

Directions:


1. Preheat oven to 425°F. Spray baking sheet with cooking spray or line with parchment paper. Give it a light dusting of flour on top of that.

2. In a large bowl, whisk together dry ingredients (through ginger).

3. In a separate bowl, whisk together pumpkin, half and half and egg.

4. Use a pastry cutter or two knives to cut butter into the dry ingredients. Continue cutting until the mixture resembles fine crumbs. (You may also use a food processor for this step. Pulse until the mixture resembles fine crumbs).

5. Fold wet ingredients into dry ingredients, then form the dough into a ball. The dough will be wet, but if it seems super sticky... just go ahead and sprinkle a little more flour into the dough until it's easier to handle. Remember, you want it to be somewhat sticky, and that's okay- but you also don't want it to stick to the baking sheet. Pat out dough onto the lightly floured baking sheet and form it into a 1-inch thick rectangle that is about 9-inches long and 3-inches wide. Use a large knife or a pizza cutter to slice the dough. It works best to cut the dough into rectangles or squares and then cut those into triangles. The originial recipie called for cutting 6 scones, but when I did that the scones were huge, so the second time I cut 12 scones, and they were the perfect size. Gently pull the triangles apart, leaving about 1/2-inch space between each one.

6. Bake 14 to 16 minutes on prepared baking sheet. Scones should begin to turn light brown. (they'll run back into each other a bit, but theyll be esy to seperate later so don't worry)

7. While scones are cooling, prepare plain glaze by whisking ingredients in a medium bowl. Mix until smooth.

8. When scones are cool, use a knife/pull them apart. Use a brush to paint a coating of the glaze over the top of each scone.

9. As the white glaze firms up, prepare spiced icing by whisking the ingredients in another medium bowl until smooth. Drizzle this thicker icing over each scone (or brush it on) and allow the icing to dry before serving.

* the first glaze keeps the second one from seeping into the scone and makes them look a bit nicer.


I hope you'll give them a try, they freeze well and still tasted good several days after I made them.

I plan on trying the chocolate chip cookie dough brownies again sometime, after I change the recipie a bit. For now I am focusing on a baking competition I am helping my brother, Bobby, with for boy scouts. The theme is the circus and we'll be doing a buttercream transfer of a circus tent and animals. Wish us luck!

Friday, February 3, 2012

Superbowl Snack Must Have

I'm not a huge sports fan. I generally don't watch sports very often, except for the four years at Penn State where I was at almost every home game. I know for a lot of non-sports people the super bowl is the one time of year they make sure they watch (if only for the commercials). I didn't even used to do that. In fact, when I was in Girl Scouts we used to go on a ski trip on Superbowl Sunday. So no superbowls for me, unless the Steelers are playing. To me it's really only fun if you really want one of the teams to win. That being said, I'll be watching this year as my boyfriend is a Giants fan. He's having a few of our friends over and I will be routing for the Giants to win. What I am most excited for though is the food! We're still talking about what to have but we know for sure that Ryan is making some delicious wings (we tested them out last night, yum!), and I'll be making brownies, and Pizza Pretzel Bites.

I stumbled across Pizza Pretzel Bites at Two Peas and Their Pod a few months ago and made them for a fun dinner one night and since then have been hooked! They are delicious and my favorite thing, easy. I could rave about how good they are, but here's something better: I made them for my cousin's birthday party last Friday and forgot to take a picture before I put them out. As soon as I remember I grabbed a picture. There were about 50 pizza pretzel bites and 7 people at the party, less than an hour into it here's what was left (we also had nachos, popcorn chicken, and drinks.... lots of drinks)


Whatever you are serving for the Superbowl, you should really think about adding these to the menu!

<3 Pizza Pretzel Bites <3

1 1/2 cups warm water
2 tablespoons brown sugar
1 package active dry yeast
3 ounces unsalted butter, melted (the recipie called for unsalted but I used salted once and didn't notice a difference)
2 1/2 teaspoons kosher salt
4 1/2 to 5 cups all-purpose flour
Canola oil
Pepperoni slices, cut into small pieces (I ripped them into quarters)
Mozarella Cheese, cut into pieces (I found a block works better than shredded)
5 quarts water
3/4 cup baking soda
1 whole egg, beaten with 1 tablespoon cold water
Coarse sea salt
Pizza sauce-for serving

Directions:
1. Combine the water, sugar, yeast, and butter in a bowl and mix until it just combined. Let that sit for 5 minutes. If you have a stand mixer or dough hook use that to mix this dough up.

2. Add the salt and flour (4 1/2 cups) and mix on low speed until combined. If you don't have a dough hook turn it out on a lightly floured surface and knead for five minutes, adding flour if it's needed. The dough will be a little sticky, but should be easy to work with. If you have a dough hook on your stand or hand mixer just turn the speed up to medium and let the mixer do the work (3-4 minutes), until the dough is smooth and begins to pull away from the side of the bowl. Remove the dough from the bowl, place on a flat surface and knead into a ball with your hands.

3. Oil a bowl with canola oil, add the dough and turn to coat with the oil. Cover with a clean towel or plastic wrap and place in a warm spot until the dough doubles in size, about 1 hour.

4. Preheat the oven to 425 degrees F. Bring the water to a boil in a large pot over high heat and carefully add the baking soda (it will bubly up like crazy!).

5. Remove the dough from the bowl and place on a flat surface. Grab a piece of dough and wrap around some chopped up cheese and peperoni. The size is up to you, mine were about an inch long. Make sure the ends are pinched tight so the cheese doesn't escape while baking. Set bites on a baking sheet and continue until all pretzel bites are stuffed.

6. Boil the pretzel bites in the water solution in batches. I did about 6-10 bites at a time. Boil for about 30 seconds. Remove with a large slotted spoon. Place pretzel bites on a baking sheet that has been lined with parchment paper or a Silpat. Make sure they are not touching (they will spread!). Brush the tops with the egg wash and season liberally with the salt. Place into the oven and bake for 15 to 18 minutes, or until golden brown.

7. Remove from oven and let cool for five minutes. Serve warm with pizza sauce.

if this sounds like a lot to be doing game day you can make them up ahead of time. After you stuff the bites place the tray you placed them on in the freezer for 5-10 minutes. Once they're a little frozen you can chuck them in a ziplock bag and store it in the freezer till game day. The day of the game just take them out of the bag and boil them, spread the egg wash on them, add salt and bake. That's how I have made them every time, and they taste delicious.

Hopefully you'll give these a try, if not for the superbowl, for another occasion soon. And who ever you are routing for, enjoy the game! And the food!

Wednesday, February 1, 2012

Easy but impressive decorated sugar cookies

While I have always enjoyed baking, it is when I started decorating sugar cookies that I discovered how pretty you can make desserts. It actually started two years ago when I made large plain pink sugar cookie hearts for my friends and wrote their names on them for a little V-day gift. They were delicious, beautiful, and didn't really take a ton of skill, just patience. The cookies I made this year for Valentines are the same way:


To make these cookies all you need are:
1) Heart shaped cut out cookies (I used a chocolate cookie I ended up not loving, use whatever recipie you like. It will work best if the cookies have a flat surface on top when they finish baking, nothing that rises too much)
2) 20 second royal icing (I use Wilton's recipie and add a little vanilla. Then you want to run a spatula through it and count the time till the surface is smooth again. It should take about 20 seconds. Add a little powder sugar if it takes less than 20 seconds and a little water if it takes more than 20 seconds)
3) A squeeze bottle like these Wilton ones
4) A ruler
5) A toothpick, or clean needle, or knife

The first thing you want to do is to take your cookie and draw a grid on it. I used the ruler to keep my lines straight and evenly spaced, but you could probably just wing it too. I used a toothpick to draw the lines in the cookie, but would recommend a clean needle or knife since I had to keep using new toothpicks


Once you finish scoring all your cookies (a nice activity to do while watching tv), brush the cookies off well (since you'll have little crumbs from scoring them) and grab your squeeze bottle filled with 20 second icing. Pick a square and outline it, then color it in, all with the same icing. 20 second icing is a good consistency that won't spread much.


I used the toothpick you see in the picture to pop any air bubbles that there are in the icing. Now you want to start filling in squares! I found it best to do every other row first like this:


This gave the corners a chance to dry a little so they didn't run into each other. Next you want to keep filling in squares but none that touch length wise, only corners, until your cookie looks like this. You can see a couple places where the corners ran together and don't look as sharp. Doing every other row helps get rid of that.:


Then put it aside and start your next cookie. After an hour or two you can go back to the first cookie and fill in the rest of the squares, the result is cookies that look like these:


Yes, it is a little time consuming, I would say it took me about 10 minutes to decorate each cookie from start to finish (not including drying time), but it's easy and pretty! I hope you'll give it a try sometime!